Easiest Way to Create a GitHub Blog using Jekyll Theme
01 Nov 2015 . TUTORIALS . Comments #tutorials
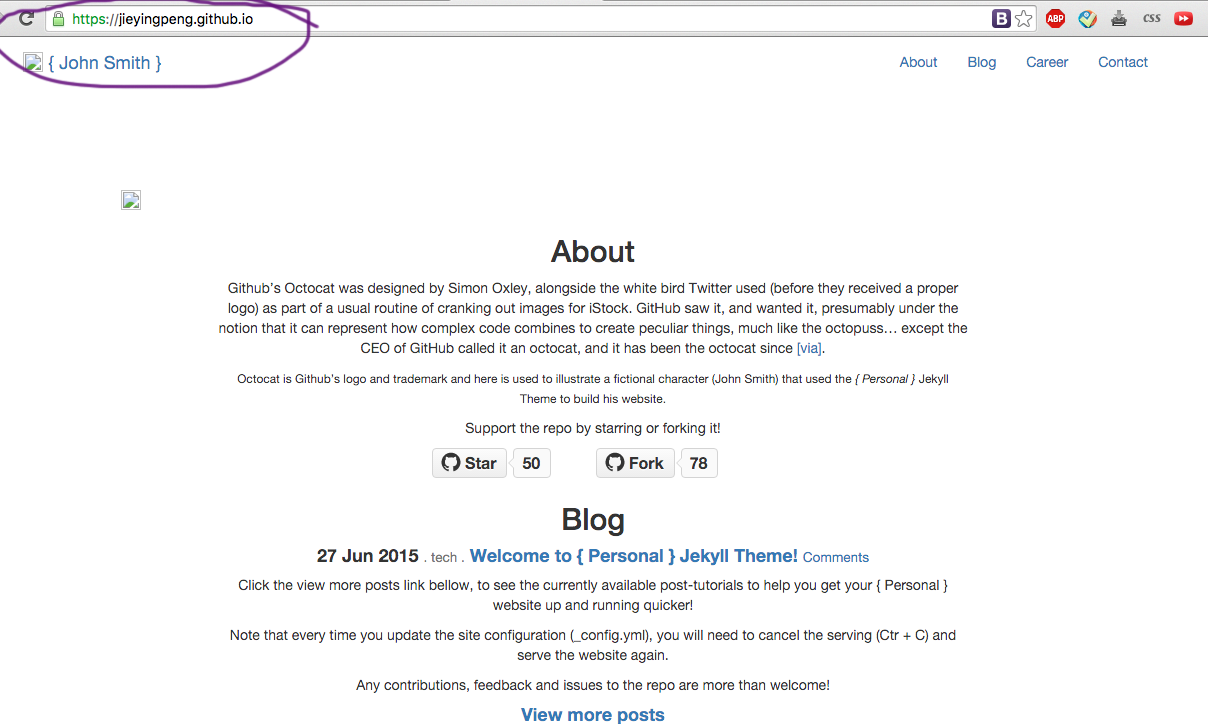
I recently created this github blog using PanosSakkos/personal-jekyll-theme.
The very first time I created my blog using a jekyll theme I actually followed github’s instructions to install jekyll and configure it.
I just realized all of that was pretty unnecessary, so I am going to show you how to setup a github blog in literally two mins.
-
Choose a jekyll theme. There are so many themes to choose from. I am going to use PanosSakkos/personal-jekyll-theme.
-
Go to the theme’s github page and fork to your own github.
-
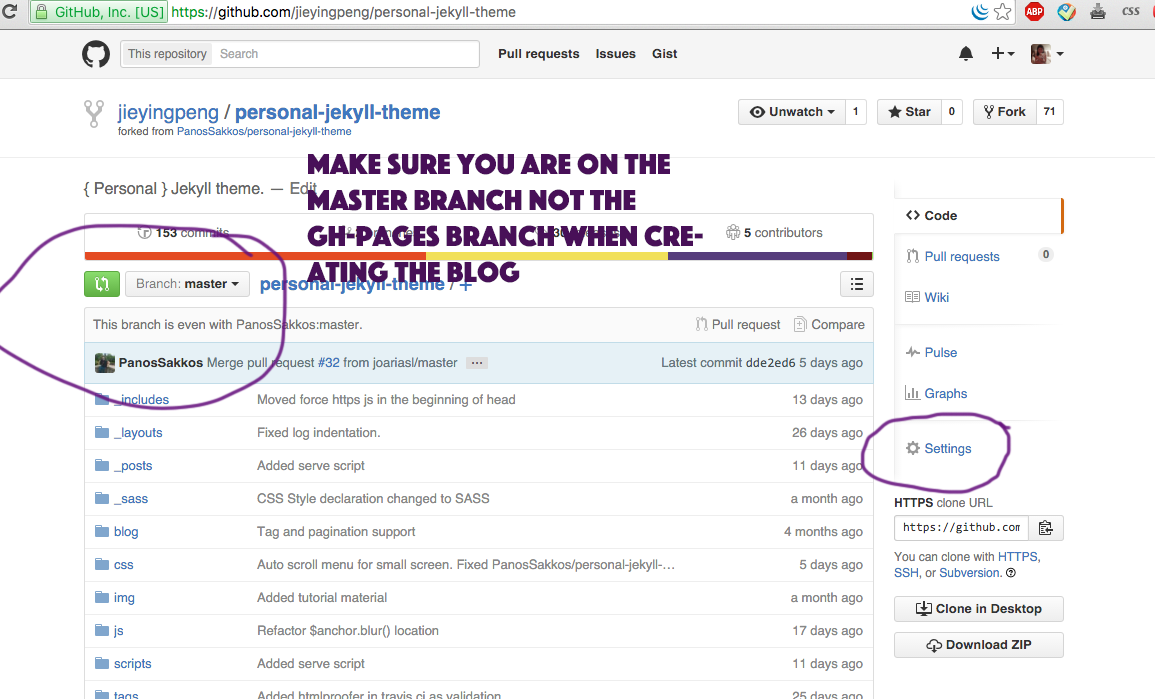
Go to your own fork and make sure that you are on the master branch. Some themes only has a gh-pages branch. If you are on the master branch already, skip step 4 and click on the settings. If you are on the gh-pages branch, go to step 4.
-
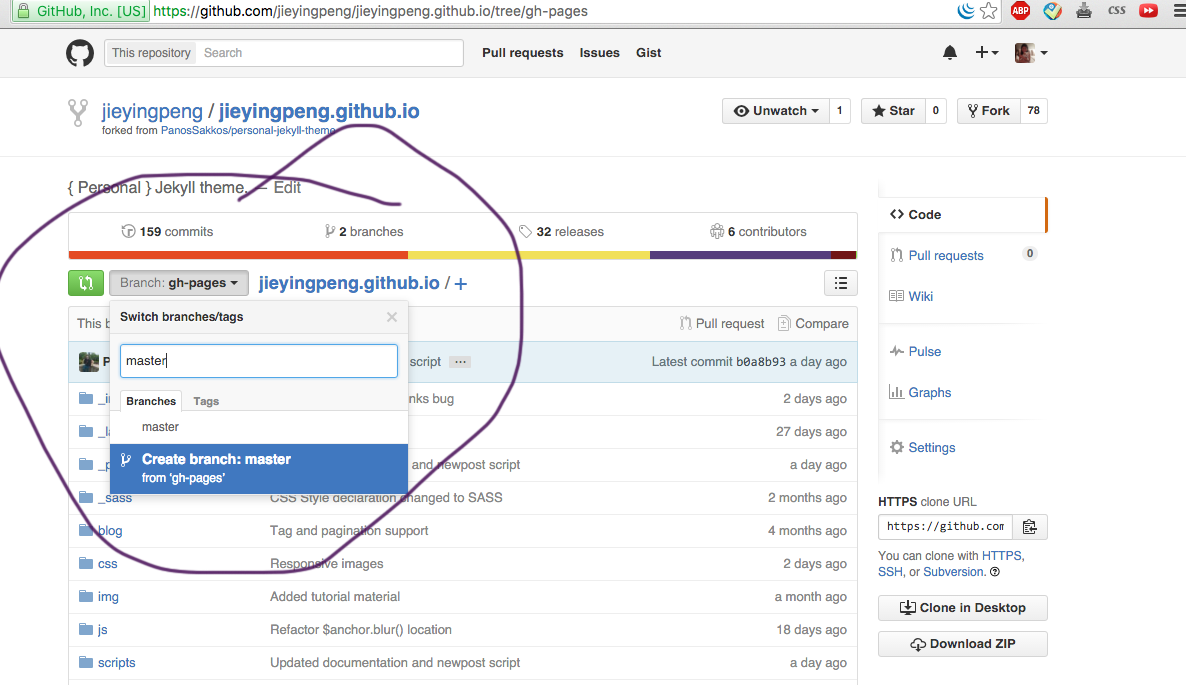
Create a master branch.
-
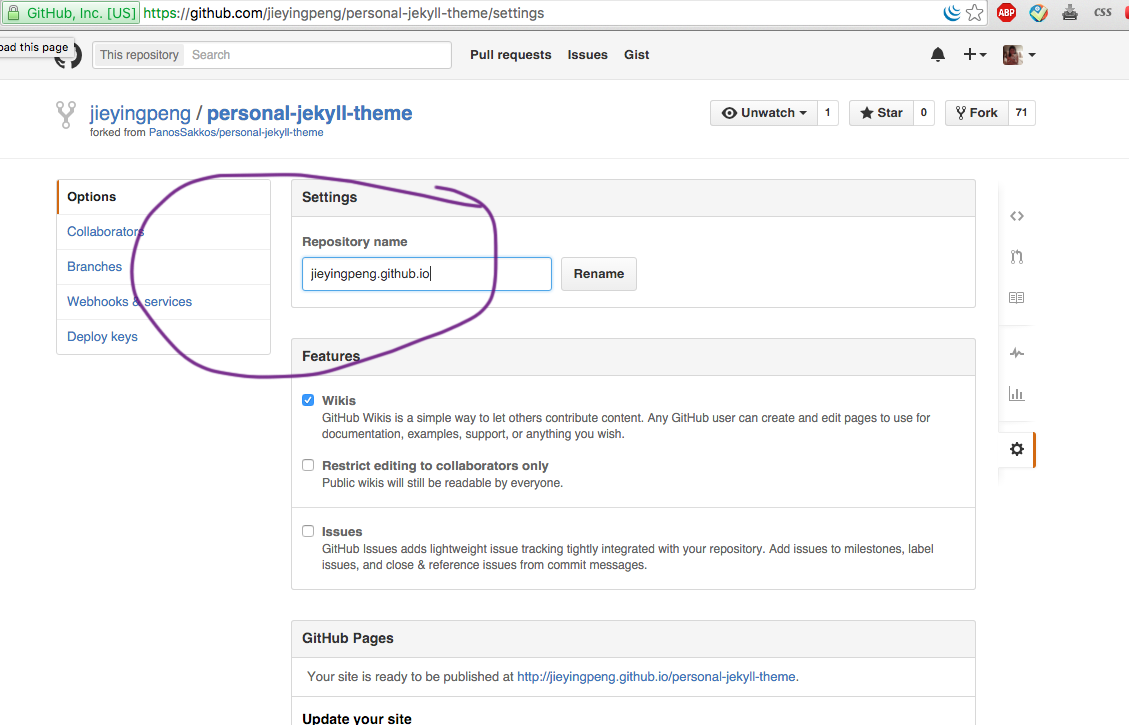
In settings, change your respository name to USERNAME.github.io make sure the ursername matches exactly to your github username, otherwise it won’t work!
-
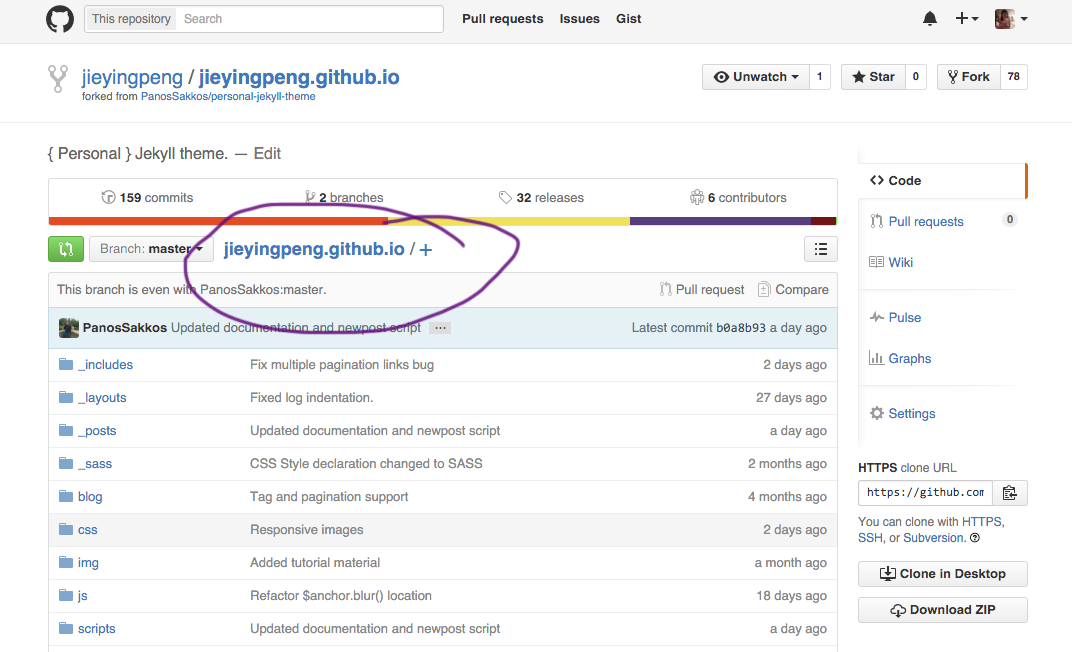
Now go back to your fork, you should see USERNAME.github.io to be the new respository name.
-
Go to USERNAME.github.io in your browser, you can see your blog now!
-
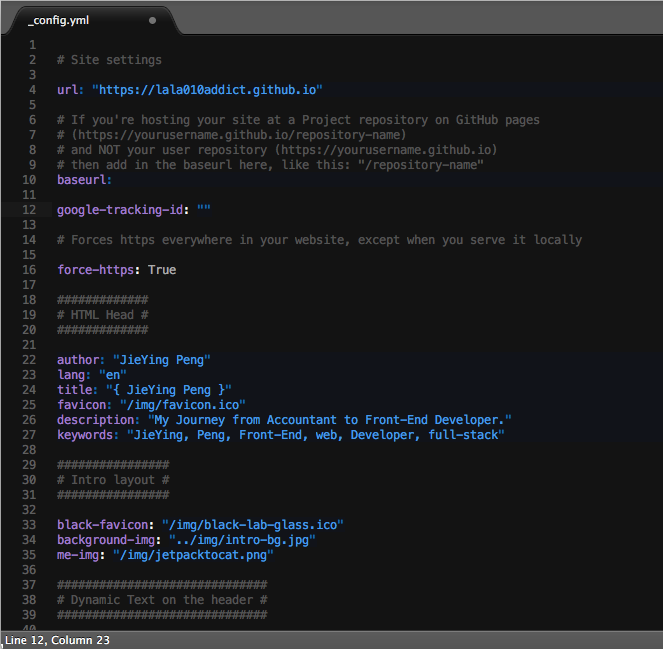
Clone down the respository to your local computer and start to customize your blog. You can start with _.config.yml file. After you are done, push back to your master branch like you normally would for any respository and your blog should be updated. Follow the README to update the rest of your blog!
That’s all!!!